Circle CI with Nx
In this tutorial we're going to learn how to leverage Nx to setup a scalable CI pipeline on Circle CI. As repositories get bigger, making sure that the CI is fast, reliable and maintainable can get very challenging. Nx provides a solution.
- Nx reduces wasted time in CI with the
affectedcommand. - Nx Replay's remote caching will reuse task artifacts from different CI executions making sure you will never run the same computation twice.
- Nx Agents efficiently distribute tasks across machines ensuring constant CI time regardless of the repository size. The right number of machines is allocated for each PR to ensure good performance without wasting compute.
- Nx Atomizer automatically splits large e2e tests to distribute them across machines. Nx can also automatically identify and rerun flaky e2e tests.
Example Repository
To follow along with this tutorial, we recommend using the nx-shops sample repository.
Example repository/nrwl/nx-shops
The nx-shops repo is useful to demonstrate the value of the CI pipeline because it has the following characteristics:
- Multiple Nx projects with interdependencies
- Defined lint, test, build and e2e tasks
- Running all the tasks takes more than a minute to finish
To get started:
Fork the nx-shop repo and then clone it to your local machine
❯
git clone https://github.com/<your-username>/nx-shops.git
Install dependencies (this repo uses PNPM but you should be able to also use any other package manager)
❯
pnpm i
Make sure all tasks are working on your machine, by running lint, test, build and e2e on all projects of the workspace
❯
pnpm nx run-many -t lint test build
Connect to Circle CI
In order to use Circle CI, you need to sign up and create an organization. Follow the steps in the Circle CI documentation to connect to your GitHub repository to a project.
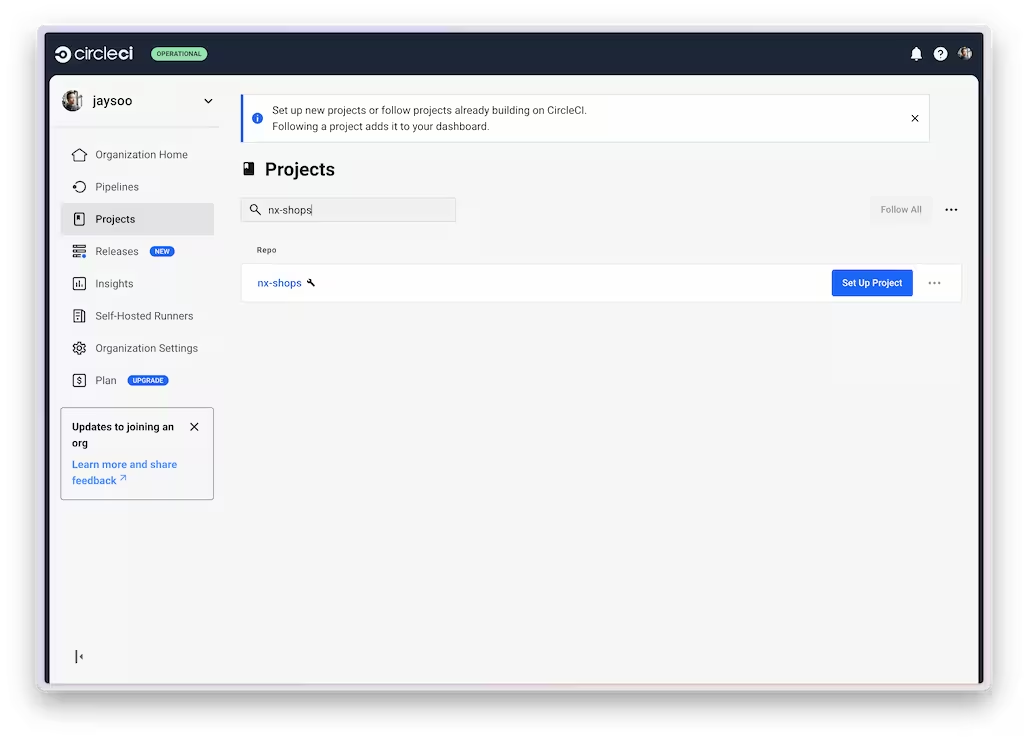
The easiest way is to create a branch and PR in your GitHub repository. Note that a sample pipeline workflow file will be created, which we will overwrite in the next step.
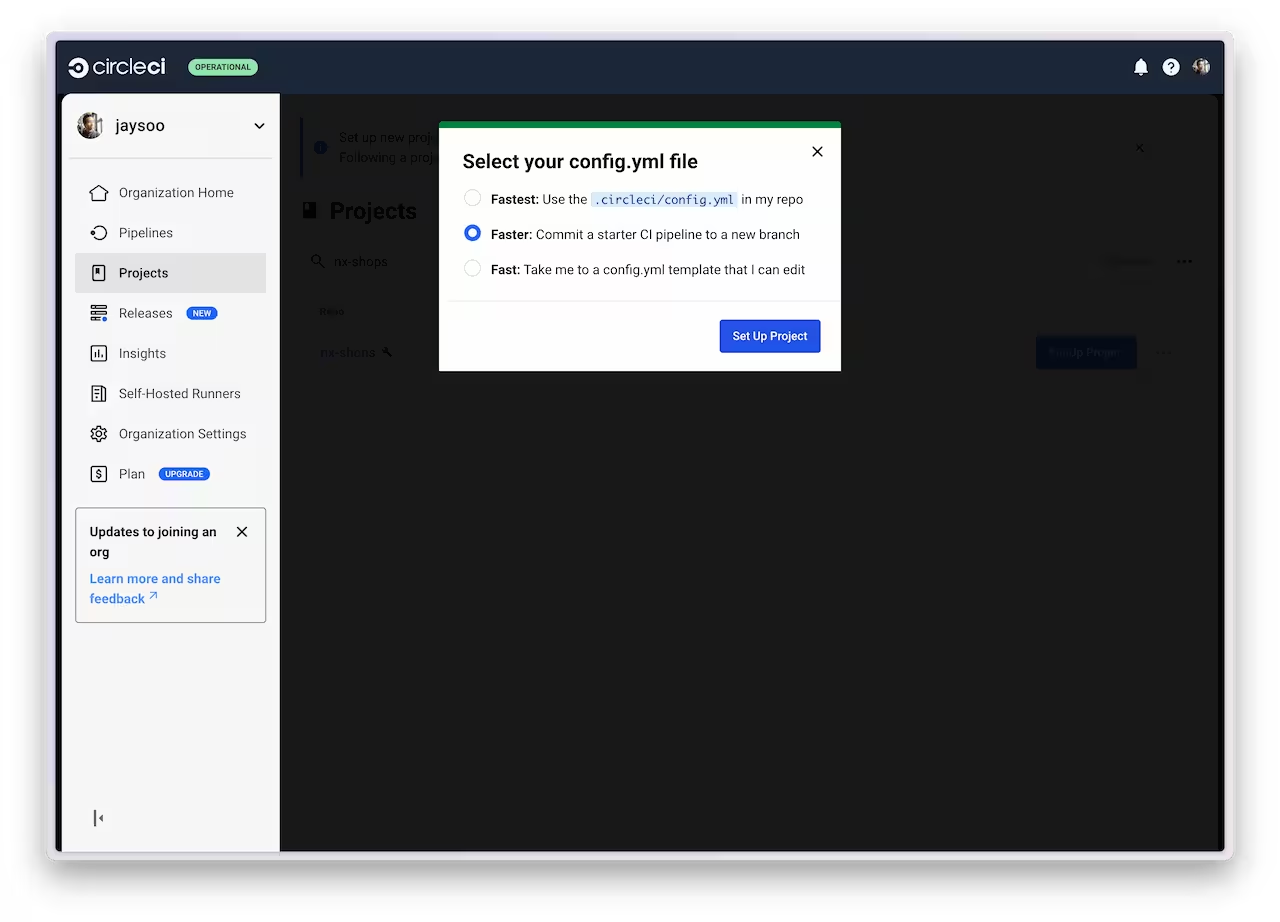
Once the PR is created, merge it into your main branch.
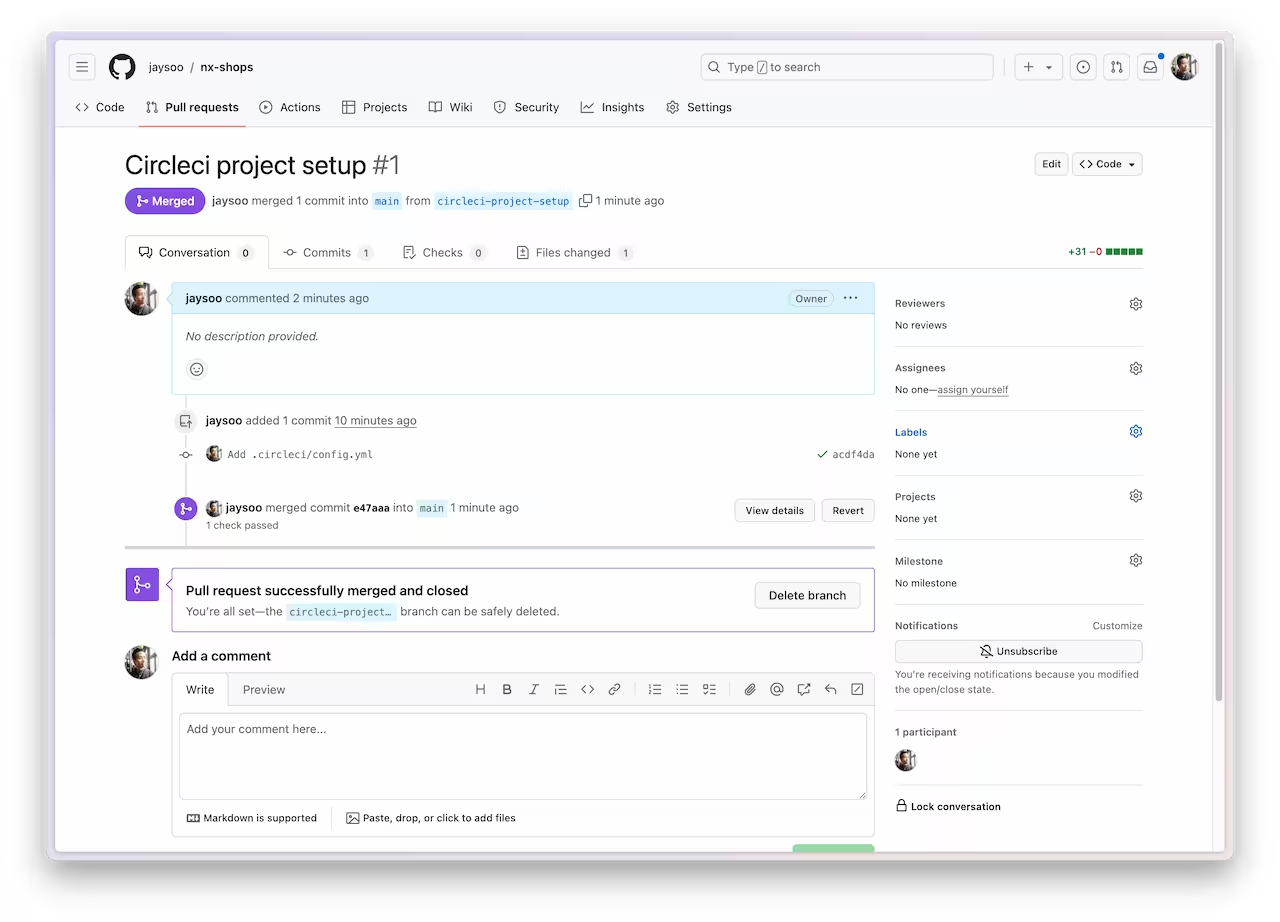
And pull the changes locally:
❯
git pull
Create a CI Workflow
First, we'll create a new branch to start adding a CI workflow.
❯
git checkout -b setup-ci
Now we can use an Nx generator to create a default CI workflow file.
❯
pnpm nx generate ci-workflow --ci=circleci
This generator will overwrite Circle CI's default .circleci/config.yml file to create a CI pipeline that will run the lint, test, build and e2e tasks for projects that are affected by any given PR.
The key lines in the CI pipeline are:
1version: 2.1
2
3orbs:
4  nx: nrwl/nx@1.6.2
5
6jobs:
7  main:
8    docker:
9      - image: cimg/node:lts-browsers
10    steps:
11      - checkout
12
13      - run:
14          name: Install PNPM
15          command: npm install --prefix=$HOME/.local -g pnpm@8
16
17      # This enables task distribution via Nx Cloud
18      # Run this command as early as possible, before dependencies are installed
19      # Learn more at https://nx.dev/ci/reference/nx-cloud-cli#npx-nxcloud-startcirun
20      # Connect your workspace by running "nx connect" and uncomment this
21      # - run: pnpm dlx nx-cloud start-ci-run --distribute-on="3 linux-medium-js" --stop-agents-after="e2e-ci"
22
23      - run: pnpm install --frozen-lockfile
24      - nx/set-shas:
25          main-branch-name: 'main'
26
27      # Prepend any command with "nx-cloud record --" to record its logs to Nx Cloud
28      # - run: pnpm exec nx-cloud record -- echo Hello World
29      - run: pnpm exec nx affected --base=$NX_BASE --head=$NX_HEAD -t lint test build
30
31workflows:
32  version: 2
33
34  ci:
35    jobs:
36      - main
37
The nx affected command will run the specified tasks only for projects that have been affected by a particular PR, which can save a lot of time as repositories grow larger.
Commit your changes and push your branch:
❯
git add .
❯
git commit -am "basic ci workflow"
❯
git push -u origin HEAD
Open up a new PR to see the run on CircleCI. If you see a message about the nrwl/nx orb not being loaded, you need to enable third-party CircleCI orbs in your organization settings. In the Circle CI project dashboard, go to Organization Settings -> Security and select Yes under Orb Security Settings: Allow Uncertified Orbs.
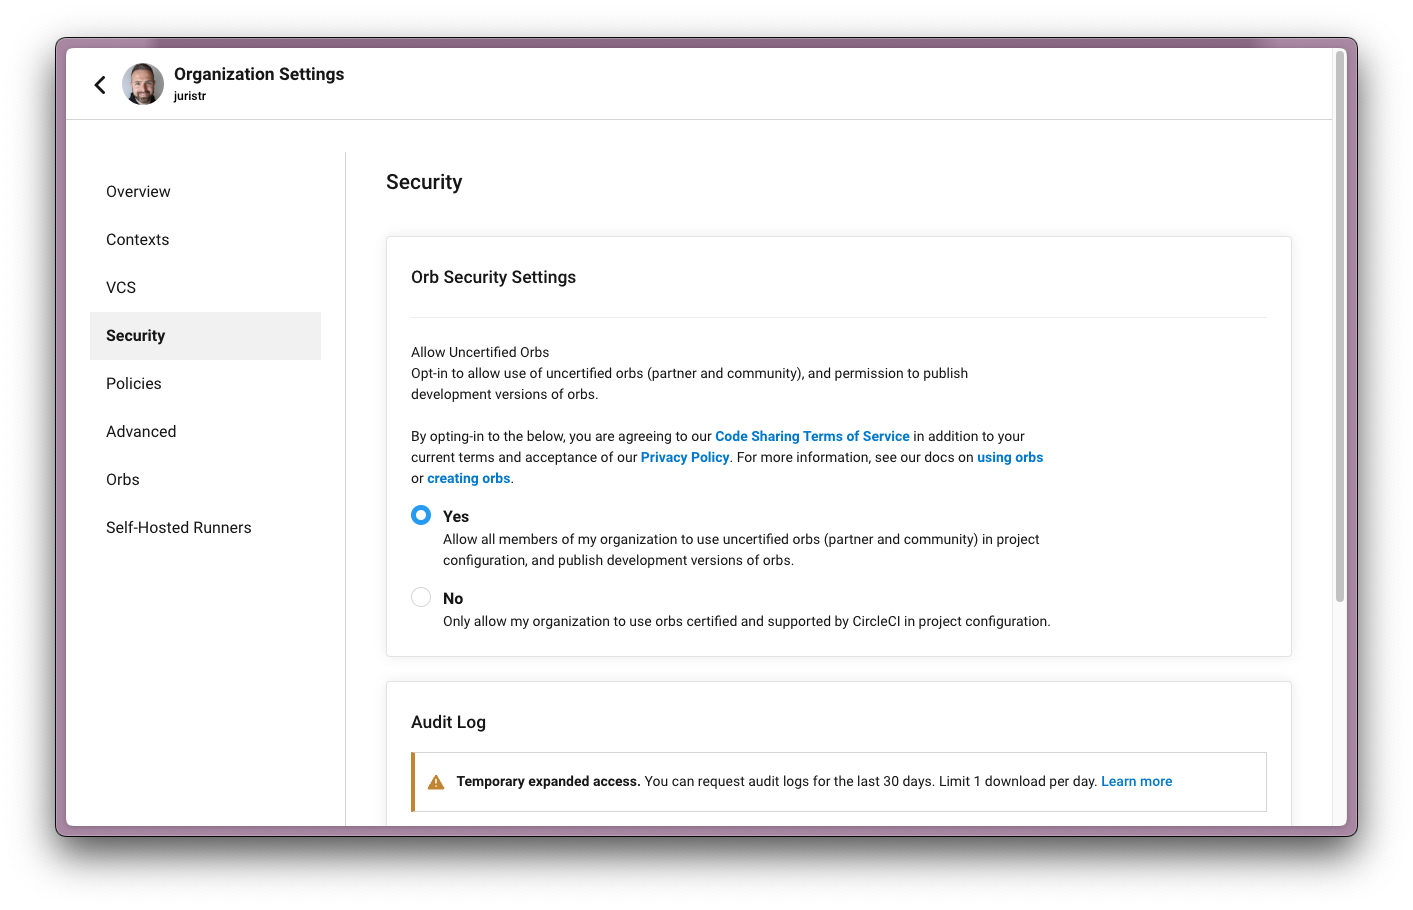
Make sure that the PR you create is against your own repository's main branch - not the nrwl/nx-shops repository.
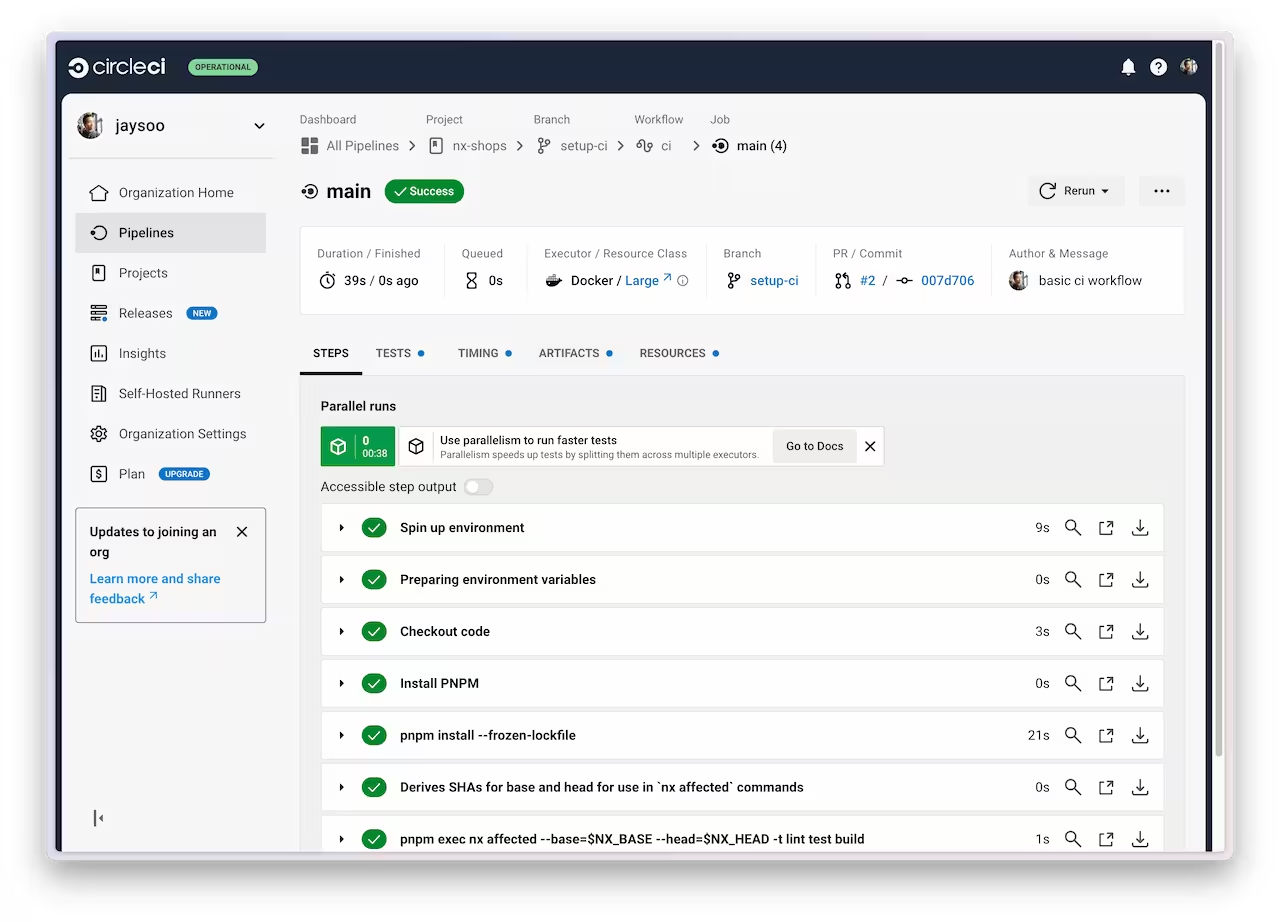
Once CI is green, merge the PR.
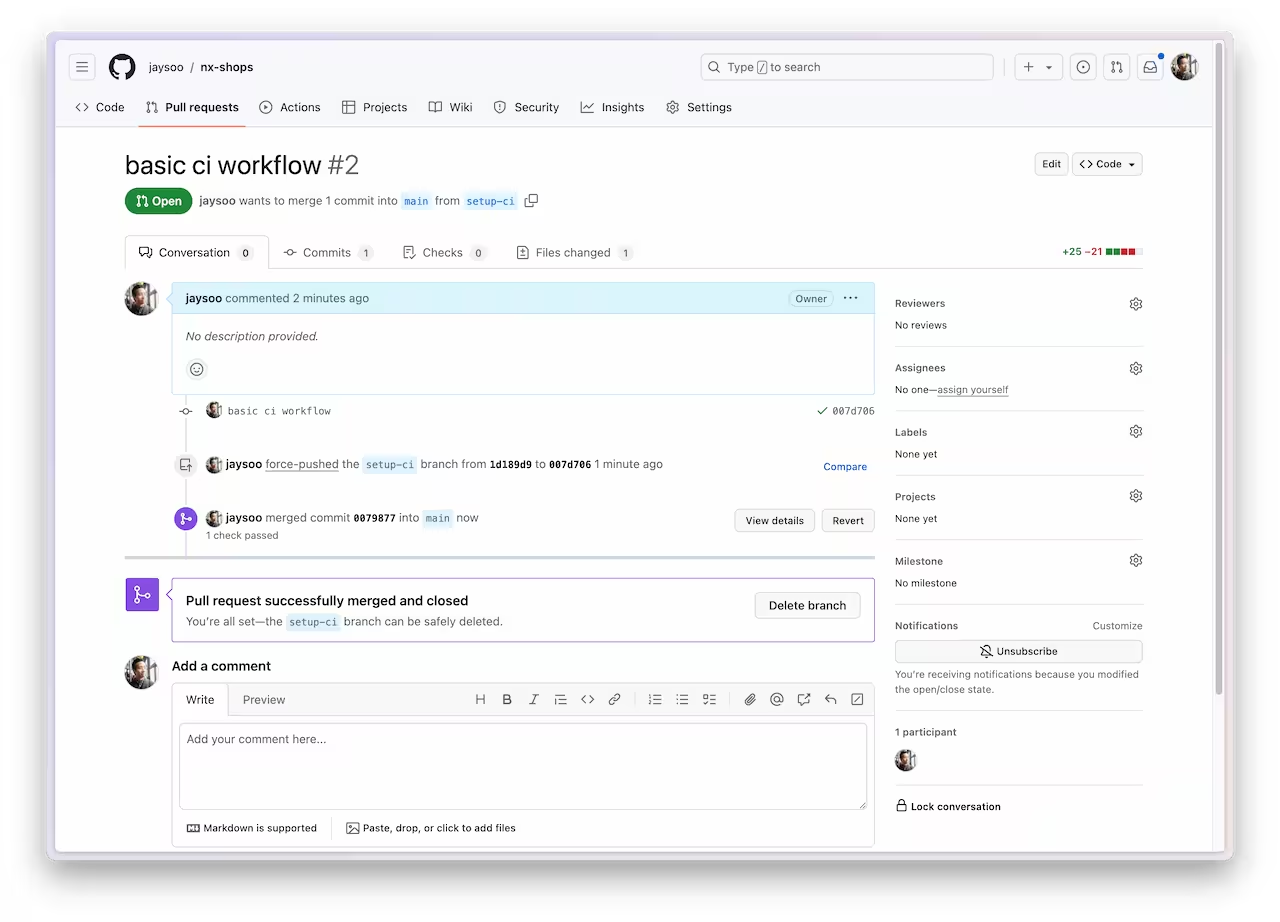
And make sure to pull the changes locally:
❯
git checkout main
❯
git pull origin main
The rest of the tutorial covers remote caching and distribution across multiple machines, which need Nx Cloud to be enabled. Let's set that up next.
Connect to Nx Cloud
Nx Cloud is a companion app for your CI system that provides remote caching, task distribution, e2e test deflaking, better DX and more.
Let's connect your repository to Nx Cloud with the following command:
❯
pnpm nx connect
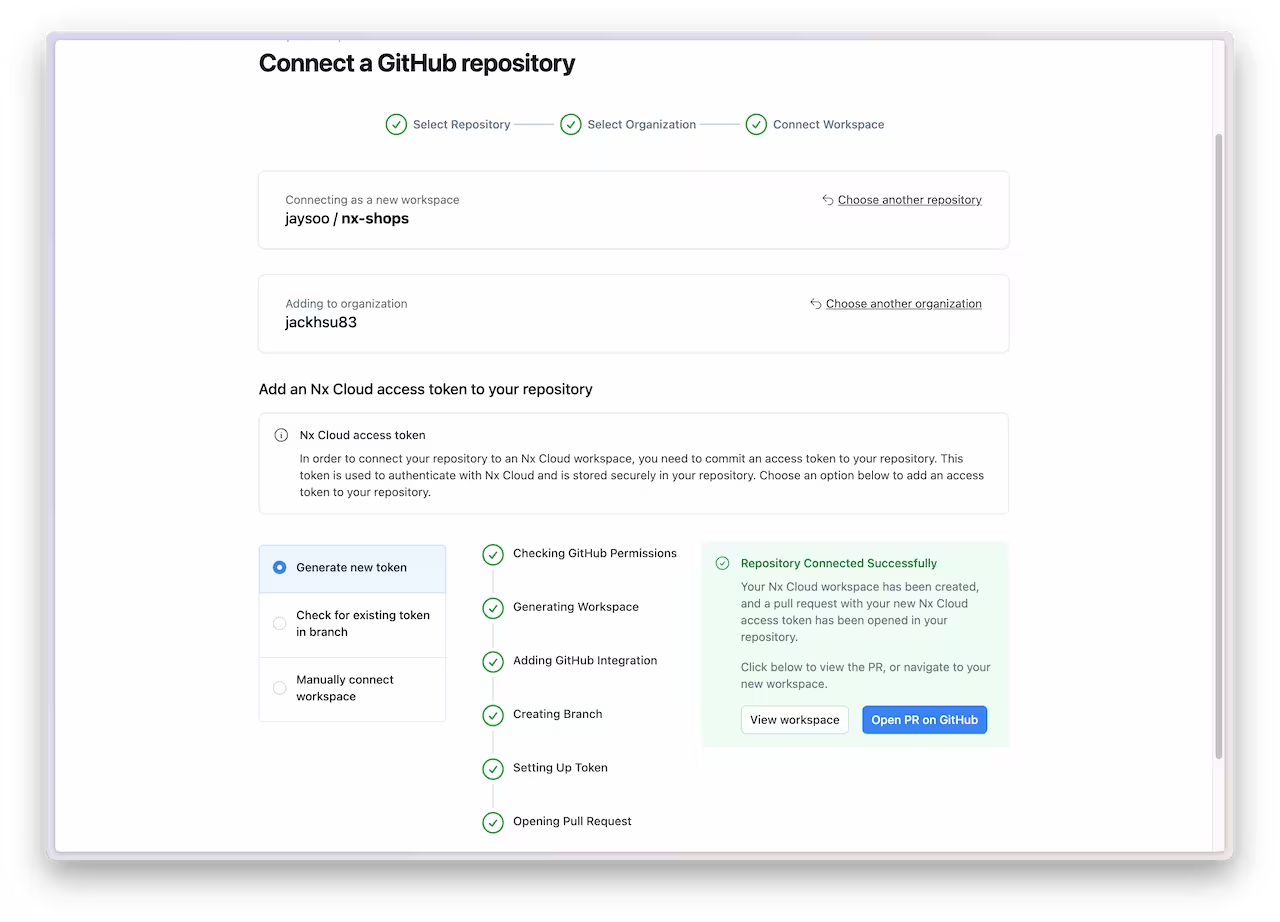
A browser window will open to register your repository in your Nx Cloud account. The link is also printed to the terminal if the windows does not open, or you closed it before finishing the steps. The app will guide you to create a PR to enable Nx Cloud on your repository.
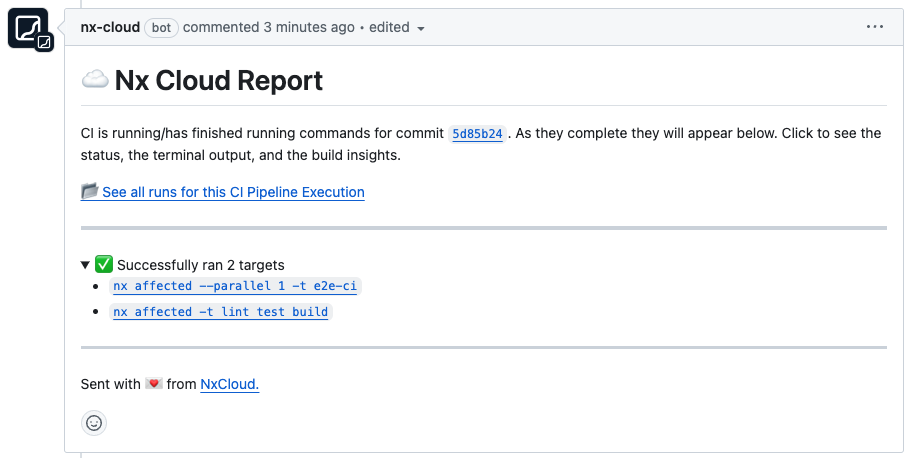
Nx Cloud will create a comment on your PR that gives you a summary of the CI run and a link to dig into logs and understand everything that happened during the CI run.
Once the PR is green, merge it into your main branch.
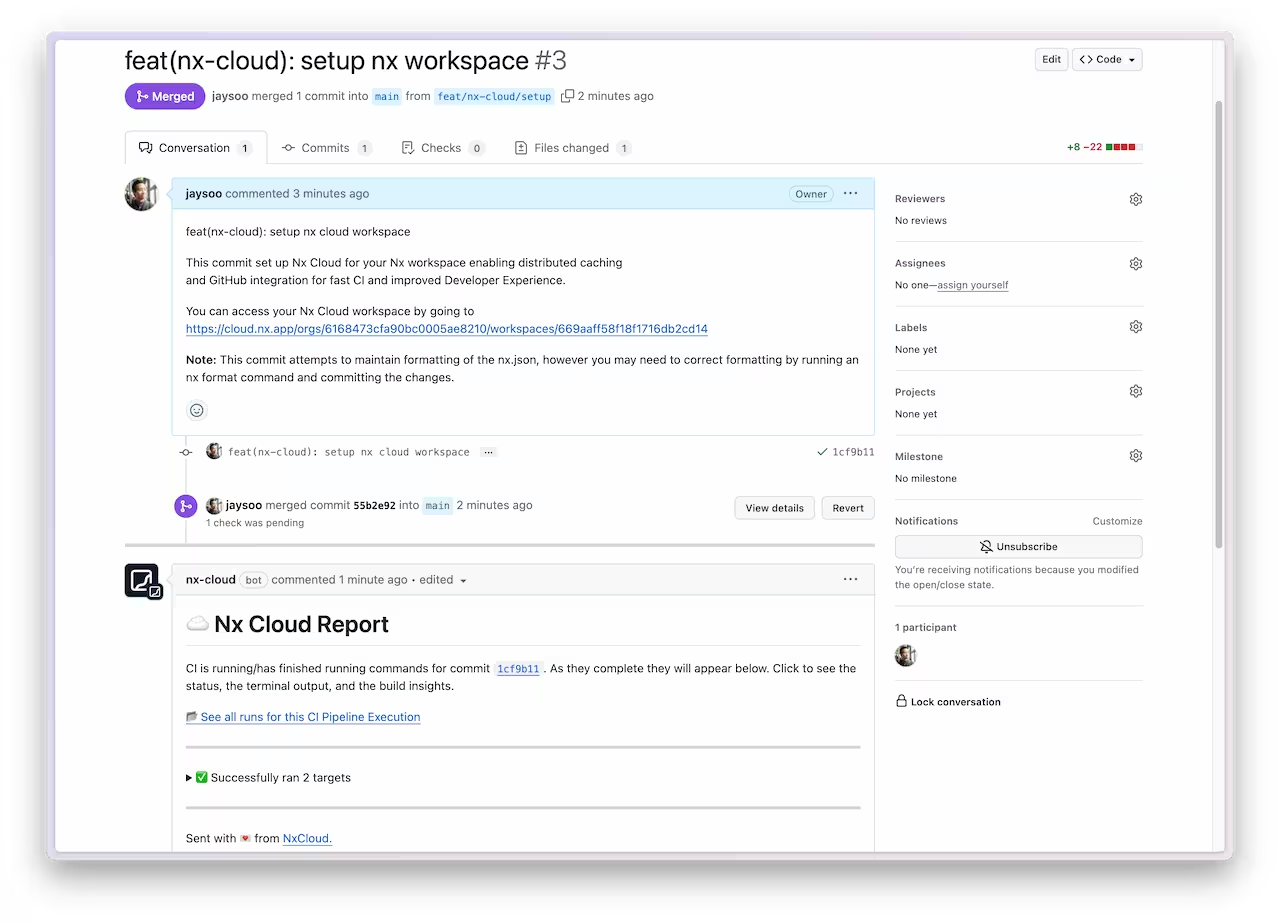
And make sure you pull the latest changes locally:
❯
git pull
You should now have an nxCloudAccessToken property specified in the nx.json file.
Understand Remote Caching
Nx Cloud provides Nx Replay, which is a powerful, scalable and, very importantly, secure way to share task artifacts across machines. It lets you configure permissions and guarantees the cached artifacts cannot be tempered with.
Nx Replay is enabled by default. We can see it in action by running a few commands locally. First, let's build every project in the repository:
❯
pnpm nx run-many -t build
Nx will store the output of those tasks locally in the .nx/cache folder and remotely in Nx Cloud. If someone else in the organization were to run the same build command on the same source code, they would receive the remotely cached outputs instead of re-running the build task themselves. We can simulate this by deleting the .nx/cache folder and re-running the build command.
❯
rm -rf .nx/cache
❯
pnpm nx run-many -t build
The build tasks complete almost instantly, and you can see in the logs that Nx has pulled the outputs from the remote cache:
1❯ nx run-many -t build
2
3   ✔  nx run shared-product-types:build  [remote cache]
4   ✔  nx run shared-product-ui:build  [remote cache]
5   ✔  nx run shared-header:build  [remote cache]
6   ✔  nx run landing-page:build:production  [remote cache]
7   ✔  nx run admin:build:production  [remote cache]
8   ✔  nx run cart:build:production  [remote cache]
9
This remote cache is useful to speed up tasks when developing on a local machine, but it is incredibly useful for CI to be able share task results across different CI pipeline executions. When a small commit is added to a large PR, the CI is able to download the results for most of the tasks instead of recomputing everything from scratch.
You might also want to learn more about how to fine-tune caching to get even better results.
Parallelize Tasks Across Multiple Machines Using Nx Agents
The affected command and Nx Replay help speed up the average CI time, but there will be some PRs that affect everything in the repository. The only way to speed up that worst case scenario is through efficient parallelization. The best way to parallelize CI with Nx is to use Nx Agents.
The Nx Agents feature
- takes a command (e.g.
run-many -t build lint test e2e-ci) and splits it into individual tasks which it then distributes across multiple agents - distributes tasks by considering the dependencies between them; e.g. if
e2e-cidepends onbuild, Nx Cloud will make sure thatbuildis executed beforee2e-ci; it does this across machines - distributes tasks to optimize for CPU processing time and reduce idle time by taking into account historical data about how long each task takes to run
- collects the results and logs of all the tasks and presents them in a single view
- automatically shuts down agents when they are no longer needed
To enable Nx Agents, make sure the following line is uncommented in the .circleci/config.yml file.
1version: 2.1
2
3orbs:
4  nx: nrwl/nx@1.6.2
5
6jobs:
7  main:
8    docker:
9      - image: cimg/node:lts-browsers
10    steps:
11      - checkout
12
13      - run:
14          name: Install PNPM
15          command: npm install --prefix=$HOME/.local -g pnpm@8
16
17      # This enables task distribution via Nx Cloud
18      # Run this command as early as possible, before dependencies are installed
19      # Learn more at https://nx.dev/ci/reference/nx-cloud-cli#npx-nxcloud-startcirun
20      # Connect your workspace by running "nx connect" and uncomment this
21      - run: pnpm dlx nx-cloud start-ci-run --distribute-on="3 linux-medium-js" --stop-agents-after="e2e-ci"
22
23      - run: pnpm install --frozen-lockfile
24      - nx/set-shas:
25          main-branch-name: 'main'
26
27      # Prepend any command with "nx-cloud record --" to record its logs to Nx Cloud
28      # - run: pnpm exec nx-cloud record -- echo Hello World
29      - run: pnpm exec nx affected --base=$NX_BASE --head=$NX_HEAD -t lint test build
30
31workflows:
32  version: 2
33
34  ci:
35    jobs:
36      - main
37
We recommend you add this line right after you check out the repo, before installing node modules.
nx-cloud start-ci-run --distribute-on="3 linux-medium-jslets Nx know that all the tasks after this line should use Nx Agents and that Nx Cloud should use three instances of thelinux-medium-jslaunch template. See the separate reference on how to configure a custom launch template.--stop-agents-after="e2e-ci"lets Nx Cloud know which line is the last command in this pipeline. Once there are no more e2e tasks for an agent to run, Nx Cloud will automatically shut them down. This way you're not wasting money on idle agents while a particularly long e2e task is running on a single agent.
Try it out by creating a new PR with the above changes.
❯
git checkout -b enable-distribution
❯
git commit -am 'enable task distribution'
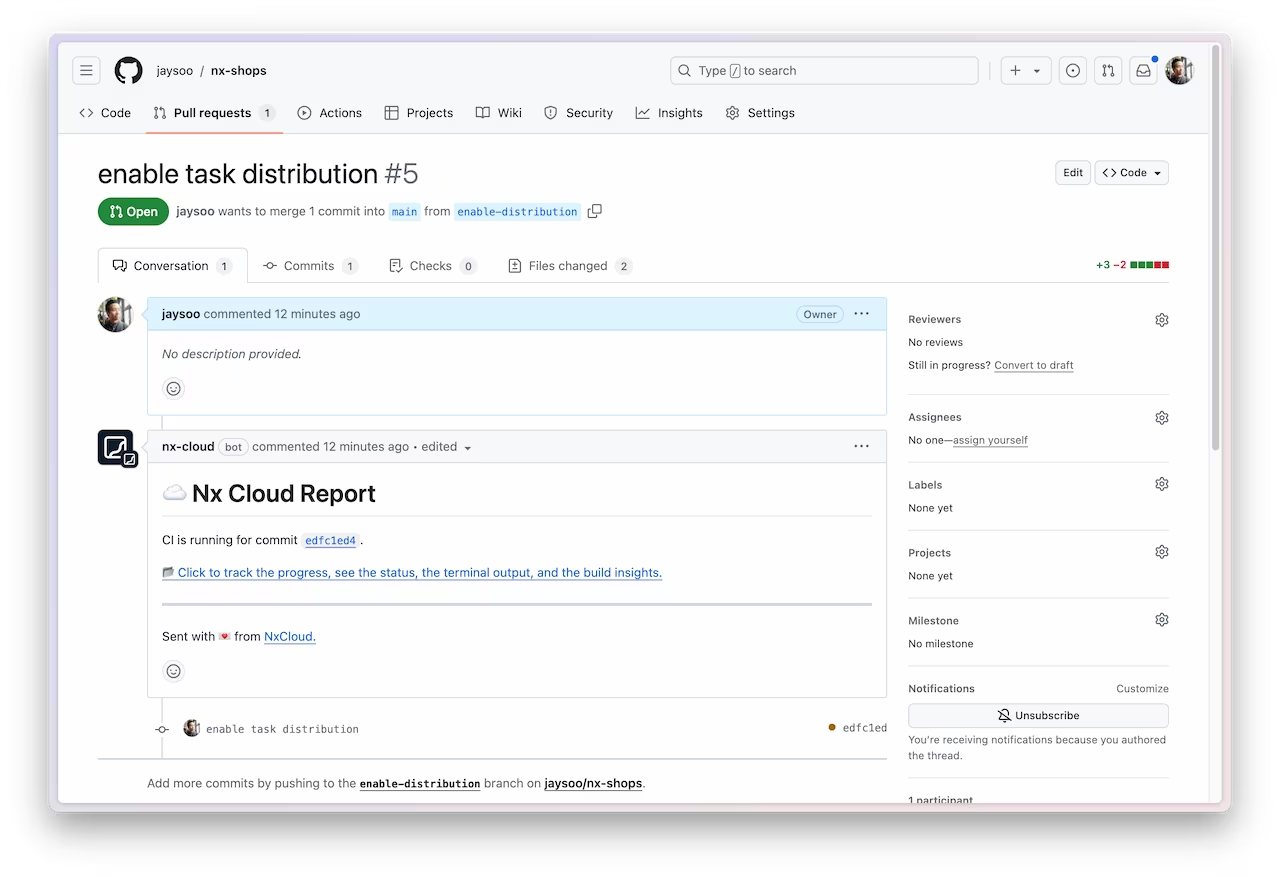
Once Circle CI starts, you can click on the Nx Cloud report to see what tasks agents are executing in real time.
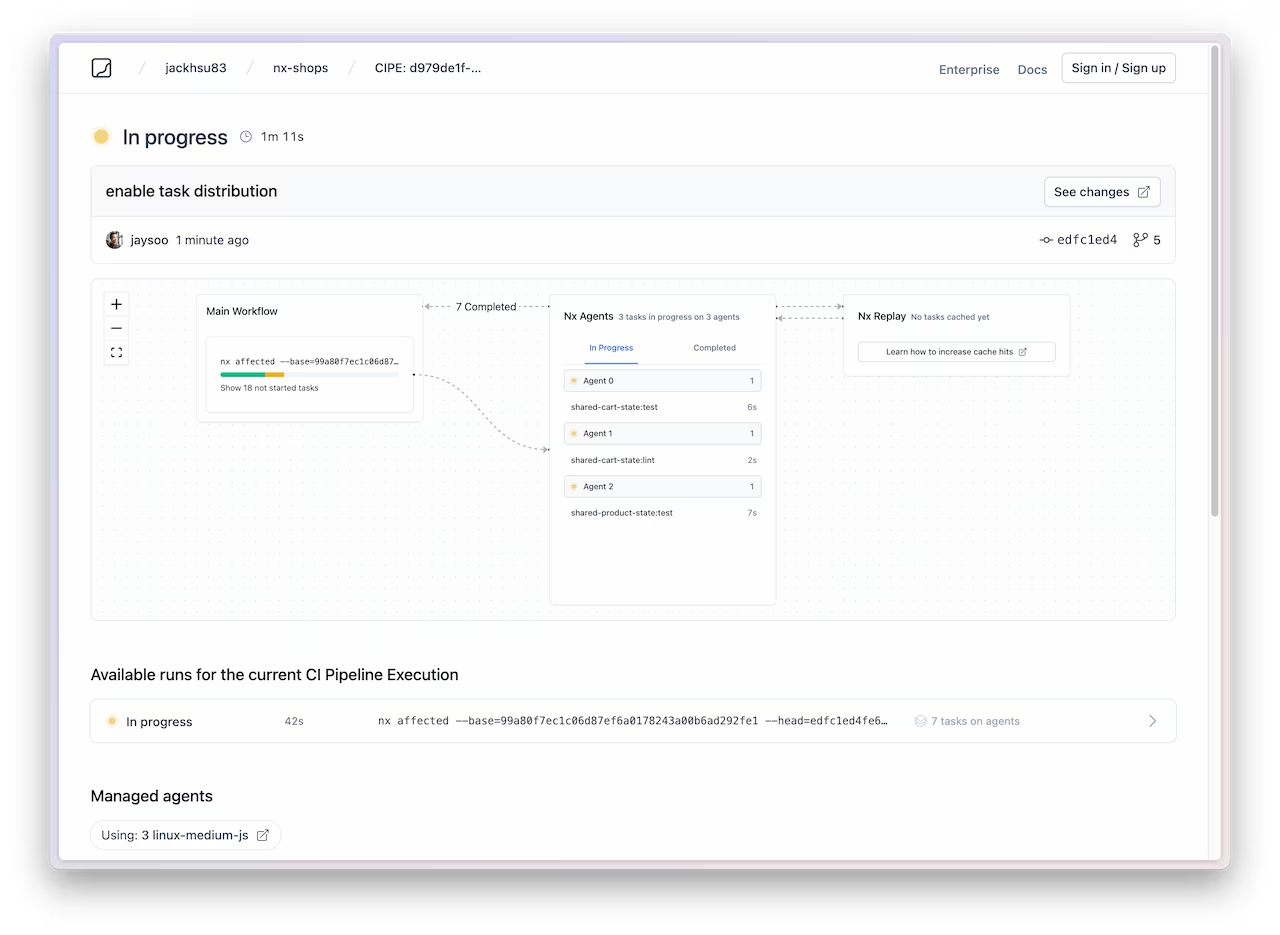
With this pipeline configuration in place, no matter how large the repository scales, Nx Cloud will adjust and distribute tasks across agents in the optimal way. If CI pipelines start to slow down, just add some agents. One of the main advantages is that this pipeline definition is declarative. We tell Nx what commands to run, but not how to distribute them. That way even if our monorepo structure changes and evolves over time, the distribution will be taken care of by Nx Cloud.
Next Steps
You now have a highly optimized CI configuration that will scale as your repository scales. See what else you can do with Nx Cloud.
- Configure dynamic agent allocation
- Learn about automatically splitting e2e tasks
- Identify and re-run flaky tasks